Quick Start Guide on VS Code
In this article, we will demonstrate how to create an aesthetically pleasing map in a desktop project using VS Code. The project is designed for Windows and uses .Net 7. However, you can also create a similar .Net Framework/.Net Core project using Visual Studio.
Display a Simple Map using VS Code
To begin working on the map, you will need to create a project in VS Code. Afterwards, we will guide you through the process of adding the required packages and setting up the map by adding a background.
Step 1: Setup VS Code
First, install .NET 7.0 SDK x64
Second, ensure that the "C#" and "NuGet Package Manager" extensions are installed in VS Code. To do this, click on the Extensions button on the left-hand side of VS Code, search for the two extensions by name, and install them. Once the installation is complete, you will find them under the INSTALLED group.
Step 2: Create a WPF Project
First, select File → Open Folder and choose a blank folder. If the TERMINAL window is not already open, select Terminal → New Terminal to open it. In this example, we will use the folder "D:\MapDemo", which will also be visible in the terminal. The name of the folder, "MAPDEMO," should show up in the explorer window on the left.
Second, create a WPF project by typing "dotnet new wpf" in the terminal and pressing enter. The project will be created, and the newly generated files can be seen in the explorer window on the left.
Next, select View → Command Palette and choose .NET: Generate Assets for Build and Debug to generate assets for building and debugging.
To begin debugging, press F5 or select Run → Start Debugging. If a blank window appears, congratulations! Your project is set up correctly.

Step 3: Add Nuget Packages
First, select View → Command Palette and choose NuGet Package Manager: Add Package. This will open the NuGet Package Search Box. Type "ThinkGeo.UI" into the search box and press Enter. From the list that appears, select ThinkGeo.UI.Wpf.
Next, select the latest version of the package (in my case, it's version 13.1.0-beta012, you can also install a release version(no beta)). Click on the version to add it to the project. You will then be prompted to restore any unresolved dependencies. Click Restore to download the necessary NuGet packages, and you're all set!
Step 4: Add the ThinkGeo Background
Add ThinkGeo.UI.Wpf namespace to MainWindow.xaml
xmlns:thinkgeo="clr-namespace:ThinkGeo.UI.Wpf;assembly=ThinkGeo.UI.Wpf"
<thinkgeo:MapView x:Name="mapView" Loaded="mapView_Loaded"></thinkgeo:MapView>
using ThinkGeo.Core;
Set up a tile cache for the base overlay to improve performance. The cache retrieves tiles from the local disk instead of downloading them from the internet each time they are needed.
private void mapView_Loaded(object sender, RoutedEventArgs e)
{
  // Set the Map's Unit to Meter.
  mapView.MapUnit = GeographyUnit.Meter;
  // Set the Current Extent to the Max Extent of ThinkGeo Map.
  mapView.CurrentExtent = MaxExtents.ThinkGeoMaps;

  // Add a base map overlay.
  var baseOverlay = new ThinkGeoCloudVectorMapsOverlay("itZGOI8oafZwmtxP-XGiMvfWJPPc-dX35DmESmLlQIU~",
      "bcaCzPpmOG6le2pUz5EAaEKYI-KSMny_WxEAe7gMNQgGeN9sqL12OA~~", ThinkGeoCloudVectorMapsMapType.Light);
  // Set up the tile cache for the base overlay, passing in the location and an ID to distinguish the cache.
  baseOverlay.TileCache = new FileRasterTileCache(@".\cache", "basemap");

  // Add the newly created overlay to mapView.
  mapView.Overlays.Add(baseOverlay);

  // Refresh the Map
  mapView.Refresh();
}
Step 5: Run the Sample & Register for Your Free Evaluation
The first time you run your application, if you have not installed a license, you may encounter a 'licenses not installed' exception.
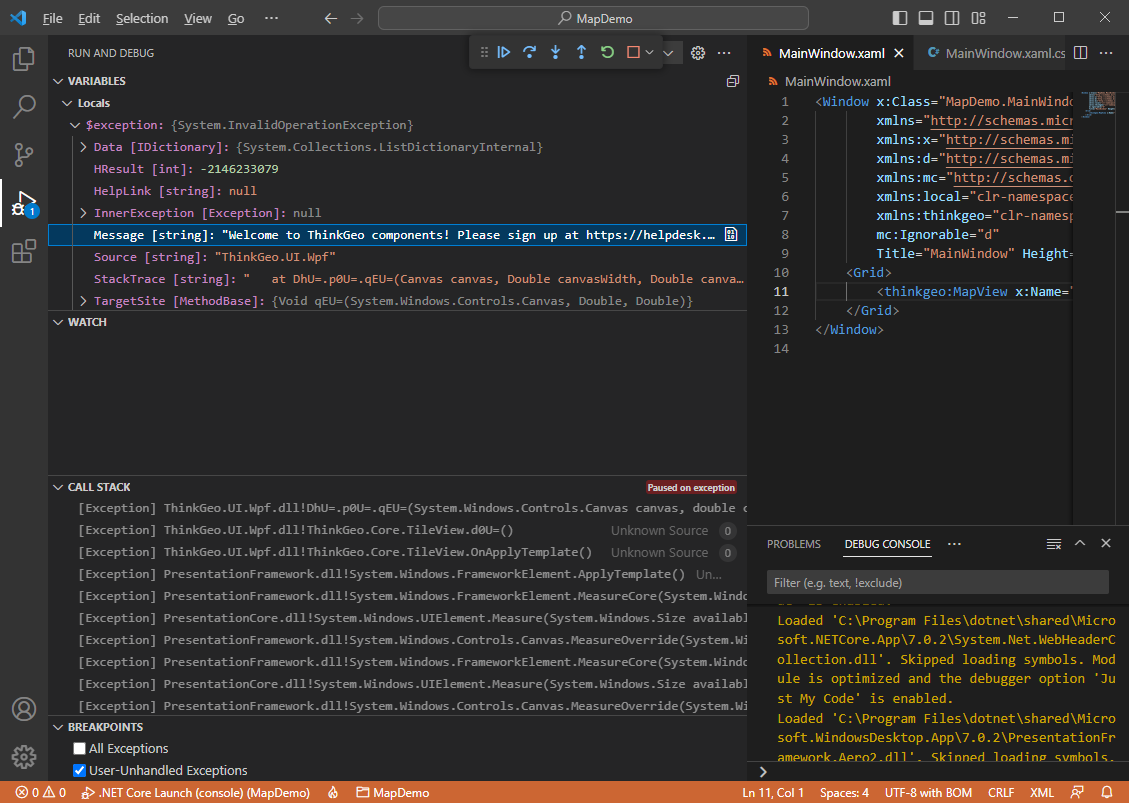
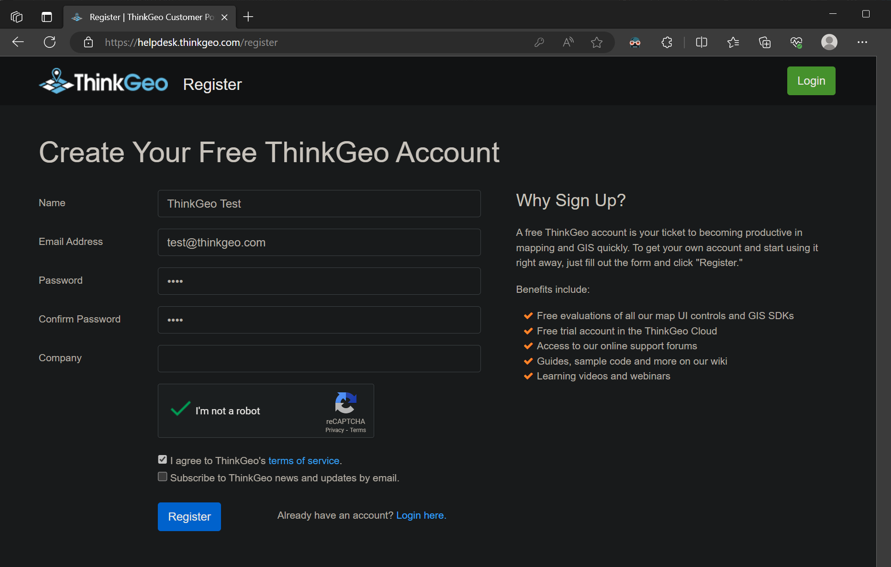
Also you will be directed to ThinkGeo's Registration Website, where you can create an account to begin a 30-day free evaluation. From there, you can download and install the Product Center and manage licenses for ThinkGeo products.
Once you activate the 'ThinkGeo UI WPF' license to start your evaluation, you should be able to see the map with our Cloud Maps layer! You can double-click to zoom in, use the mouse wheel to zoom in/out, and track zoom in by holding down the Shift key and tracking the map. Additionally, you can rotate the map by holding down the Alt key and dragging the map.
Summary
You now have a basic understanding of how to use the ThinkGeo Map controls in VS Code and can begin adding functionality to your own applications. Let's review what we've learned about the object relationships and how the pieces of ThinkGeo UI work together:
- A
MapViewis the fundamental control that contains all the other objects used to determine how the map is rendered. - A
MapViewhas multipleOverlays, and eachOverlaycorresponds to a tier of images displayed on the map control. - The
MapUnit(feet, meters, decimal degrees, etc.) andCurrentExtentneed to be correctly set for theMapcontrol.
Congratulations, you are now in an excellent position to review the How Do I Sample and explore other features.