This guide uses Visual Studio 2022, but you can follow similar steps in other IDEs, such as JetBrains Rider.
Quick Start Guide
In this section, we'll show you how to create a visually appealing map with ThinkGeo Cloud Maps as the background. We highly recommend that you also take a look at the How Do I Samples on Gitlab, which has over 90 examples covering virtually everything you can do with the control.
Step 1: Create a Maui Project
Create a C# Maui project with .NET 8.0. For the best experience and latest MAUI support, ensure your Visual Studio is updated to the most recent version.

Step 2: Add the ThinkGeo MAUI Nuget Package:
Install the ThinkGeo.UI.Maui NuGet package through NuGet package manager.
NOTE: You can switch between the Beta Branch and Release Branch by checking/unchecking the "Include prerelease" checkbox. The Beta Branch contains the latest features/bug fixes, while the Release Branch is more stable and better tested. Check out this guide for more details.
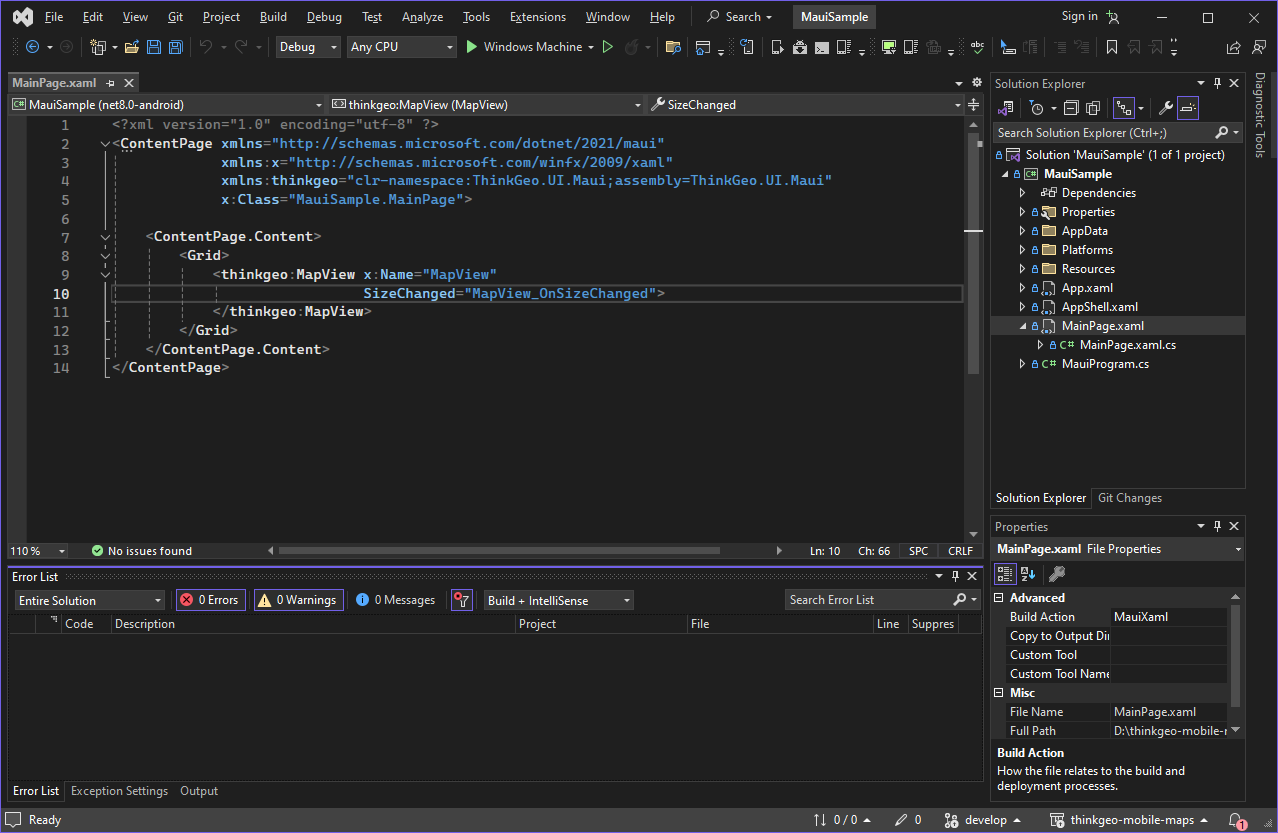
Step 3: Add the Map Control to MainPage.xaml
Add the ThinkGeo.UI.Maui namespace to MainPage.xaml
xmlns:thinkgeo="clr-namespace:ThinkGeo.UI.Maui;assembly=ThinkGeo.UI.Maui"
Add the map control within Grid element in MainPage.xaml file.
<thinkgeo:MapView x:Name="MapView"
    SizeChanged="MapView_OnSizeChanged">
</thinkgeo:MapView>
Step 4: Add the ThinkGeo Cloud Base Map Overlay
Import the namespace at the top of 'MainPage.xaml.cs` file.
using ThinkGeo.Core;
using ThinkGeo.UI.Maui;
Add the following code to the MapView_OnSizeChanged event. Using the _initialized flag, this code will run once when the map is fully loaded and ready for use. (The key passed in ThinkGeoVectorOverlay is for test only, you can apply for your own key from ThinkGeo Cloud)
We have established a tile cache for the base overlay to enhance performance. The code snippet FileSystem.Current.CacheDirectory retrieves the cache directory for the app across all platforms.
In this example, we configure the MapUnit, OnSizeChanged event, Rotation, and ZoomMapTool in the C# code.
private bool _initialized;

private async void MapView_OnSizeChanged(object sender, EventArgs e)
{
    if (_initialized)
        return;
    _initialized = true;

    // Set the map's unit of measurement to meters(Spherical Mercator)
    MapView.MapUnit = GeographyUnit.Meter;

    // Add ThinkGeo Cloud Maps as the background
    var backgroundOverlay = new ThinkGeoVectorOverlay
    {
        ClientId = "9ap16imkD_V7fsvDW9I8r8ULxgAB50BX_BnafMEBcKg~",
        ClientSecret = "vtVao9zAcOj00UlGcK7U-efLANfeJKzlPuDB9nw7Bp4K4UxU_PdRDg~~",
        MapType = ThinkGeoCloudVectorMapsMapType.Light,
        TileCache = new FileRasterTileCache(FileSystem.Current.CacheDirectory, "ThinkGeoVectorLight_RasterCache")
    };
    MapView.Overlays.Add(backgroundOverlay);

    // set up the map rotation and map tools
    MapView.IsRotationEnabled = true;
    MapView.MapTools.Add(new ZoomMapTool());

    // set up the map extent and refresh
    MapView.CenterPoint = new PointShape(450061, 1074668);
    MapView.MapScale = 74000000;

    await MapView.RefreshAsync();
}
Step 5: Run the Sample & Register for Your Free Evaluation
The first time you run your application, if you have not installed a license, you may encounter a 'licenses not installed' exception.

You can open the ThinkGeo's Registration Website, where you can create an account to begin a 30-day free evaluation. From there, you can download and install the Product Center and manage licenses for ThinkGeo products, please refer to the ThinkGeo UI Maui License Guide for additional details.
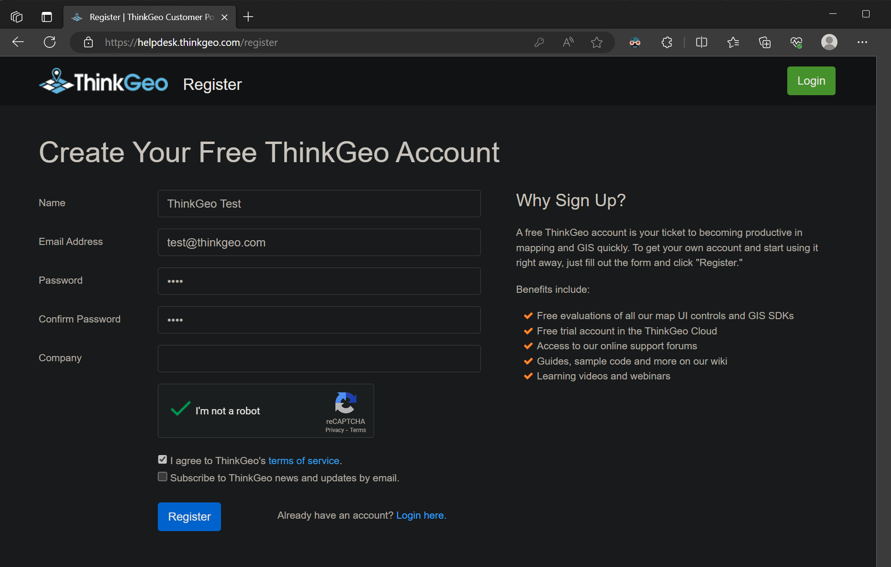
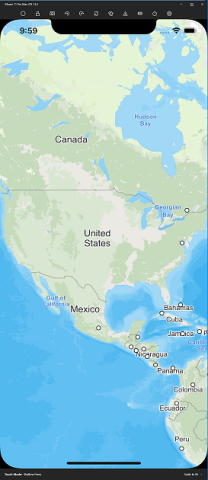
Once you activate the 'ThinkGeo UI Maui' license to start your evaluation, you should be able to see a working map with the ThinkGeo Cloud base map!
On Windows, you can double-click to zoom in, use the Plus/Minus buttons to adjust zoom, and perform track zoom by holding the Shift key while dragging the map. Additionally, rotate the map by holding the Alt key and dragging.
On both Android and iOS, you can double-click to zoom in, use the Plus/Minus buttons to zoom in or out, and rotate the map by holding a control key (such as Ctrl, Alt, or Option, depending on the operating system and emulator) and dragging within the Android Emulator, or by pinching on a real device
NOTE: When debugging your application in an Android or iOS/MacCatalyst emulator, you will need to follow Step 2 of the Licensing Guide to generate a license for the emulator.


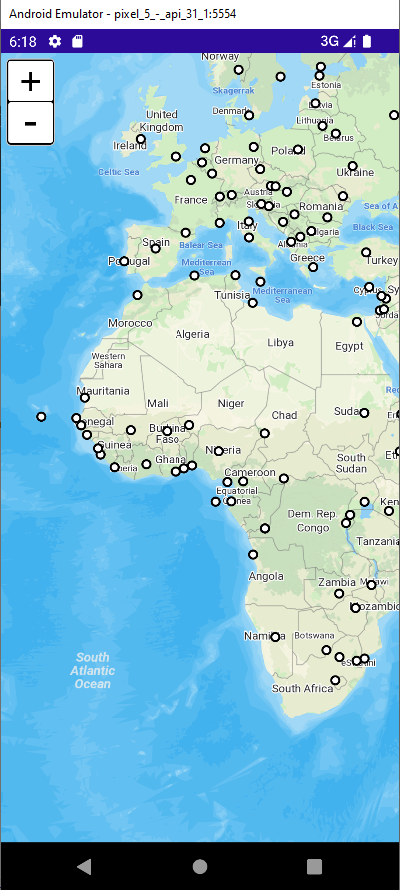
Step 6: Add a Point Data Layer to the Map
Now that you have a basic setup, you can add custom data to the map. Depending on the data, this can be either complex or simple. Here, we are going to add a shapefile to the map. We will set the style for the shapefile, apply the style to a range of zoom levels, and project the shapefile from one projection (Decimal Degrees) to another (Spherical Mercator). This is basically what you need to do when displaying feature data on the map.
Download the WorldCapitals shapefile data and use it in your project under a new folder called "AppData". To use these shapefile data across platforms like Windows, Andoid, and iOS, you should add the data files as embedded resources and copy them to the app's data directory when running it for the first time. Add the "CopySampleData" method in the "OnStart" function of the "App.xaml.cs" file.
Embedded Resources
Ensure that the WorldCapitals files are all set as an embedded resource when adding them to the project. In Visual Studio, this can be set via the Build Action dropdown in the file properties.
protected override async void OnStart()
{
    await CopySampleData(FileSystem.Current.AppDataDirectory);
}

private static async Task CopySampleData(string targetFolder)
{
    var assembly = Assembly.GetExecutingAssembly();
    List<string> dataFiles = new List<string>
    {
        @"WorldCapitals.dbf",
        @"WorldCapitals.ids",
        @"WorldCapitals.idx",
        @"WorldCapitals.shp",
        @"WorldCapitals.shx"
    };
    foreach (var dataFile in dataFiles)
    {
        var localPath = @"AppData/" + dataFile;
        var targetFilePath = Path.Combine(targetFolder, localPath);
        if (File.Exists(targetFilePath)) continue;

        var targetDir = Path.GetDirectoryName(targetFilePath);
        if (!Directory.Exists(targetDir))
            Directory.CreateDirectory(targetDir);

        await using (var targetStream = File.Create(targetFilePath))
        {
            var sourceStream = assembly.GetManifestResourceStream(@"{ProjectName}.AppData." + dataFile);
            await sourceStream.CopyToAsync(targetStream);
            sourceStream.Close();
        }
    }
}
Be sure to change the {ProjectName} placeholder in the above code to the name of your project. From there, we can add the shapefile to the map via the "MapView_OnSizeChanged" method in the "MainPage.xaml.cs" file. Insert the following code above the RefreshAsync() method call to have it displayed during the first refresh:
// Add a shapefile layer with point style.
var filePath = Path.Combine(FileSystem.Current.AppDataDirectory, "AppData", "WorldCapitals.shp");
var capitalLayer = new ShapeFileFeatureLayer(filePath);
var capitalStyle = new PointStyle()
{
    SymbolType = PointSymbolType.Circle,
    SymbolSize = 8,
    FillBrush = new GeoSolidBrush(GeoColors.White),
    OutlinePen = new GeoPen(GeoColors.Black, 2)
};
// Each layer has 20 preset zoomlevels. Here we set the capitalStyle for ZoomLevel01 and apply the style to the other preset zoomlevels.
capitalLayer.ZoomLevelSet.ZoomLevel01.DefaultPointStyle = capitalStyle;
capitalLayer.ZoomLevelSet.ZoomLevel01.ApplyUntilZoomLevel = ApplyUntilZoomLevel.Level20;

// The shapefile is in Decimal Degrees, while the base overlay is in Spherical Mercator.
// It's why the shapefile needs to be reprojected to match the coordinate system of the base overlay.
capitalLayer.FeatureSource.ProjectionConverter =
    new ProjectionConverter(Projection.GetDecimalDegreesProjString(), Projection.GetSphericalMercatorProjString());

// Add the layer to an overlay, add that overlay to the map.
var customDataOverlay = new LayerOverlay();
customDataOverlay.Layers.Add(capitalLayer);
MapView.Overlays.Add(customDataOverlay);
Summary
You now have a basic understanding of how to use the ThinkGeo UI Maui controls and can begin adding functionality to your own applications. Let's review what we've learned about the object relationships and how the pieces of ThinkGeo UI Maui work together:
- A
MapViewis the fundamental control that contains all the other objects used to determine how the map is rendered. - A
MapViewhas multipleOverlays, and eachOverlaycorresponds to a tier of images displayed on the map control. - The
MapUnit,CenterPointandMapScaleneed to be correctly set for the map control. - A FeatureLayer can have multiple ZoomLevels, which define the upper and lower ranges of when a layer should be shown or hidden, and the styles for how the layer is supposed to be displayed.
- The MapUnit (feet, meters, decimal degrees, etc.) and map extent(CenterPoint, MapScale) need to be correctly set for the Map control.
Congratulations, you are now in an excellent position to review the How Do I Sample and explore other features.